Showing posts with label "Ford Probe Body Kit". Show all posts

253: Sunday 9th June 2013

I still have the roof to paint, but I also had a flue pipe to fit on our house this weekend. That took some time and today the weather is not so good, so I decided not to attempt any painting. I did fit the new front license plate. I like the way it looks, fits nicely to the bumper and doesn't hide any of the styling features. Friday my brother came round to check out the body kit fit and finish so we can work out the preparation for the final paint job. I should be able to get a big workshop for a weekend so we can get it nice and heat soaked, smoothed over and primed then flatted and painted. I can start organising the battery monitoring system now and get it fitted and working. It is good timing as I Have at least one, and I suspect more, batteries that are faulty including the auxiliary battery for the 12v system. Then I can put the interior back together and sort out some fresh batteries. Then get a new MOT test and I'll be back on the road. I need to get running again so I can get my car to the workshop for painting. Anyway I am pleased with the new GB number plate.

252: Sunday 3rd June 2013

Yesterday I went to Liverpool with my friend and neighbour so he could get a 4x4 Ford Cougar he was buying. 242 miles and 4 hours later we arrived, paid the guy and then drove back. Before I went I put a coat of red on the front bumper ready to go on. I added a piece of red tube that I had from some old air horns to fill the hood gap at the front. It doesn't close up the gap, but it does stop the line of sight through to inside, so you cannot see all screws etc.
----
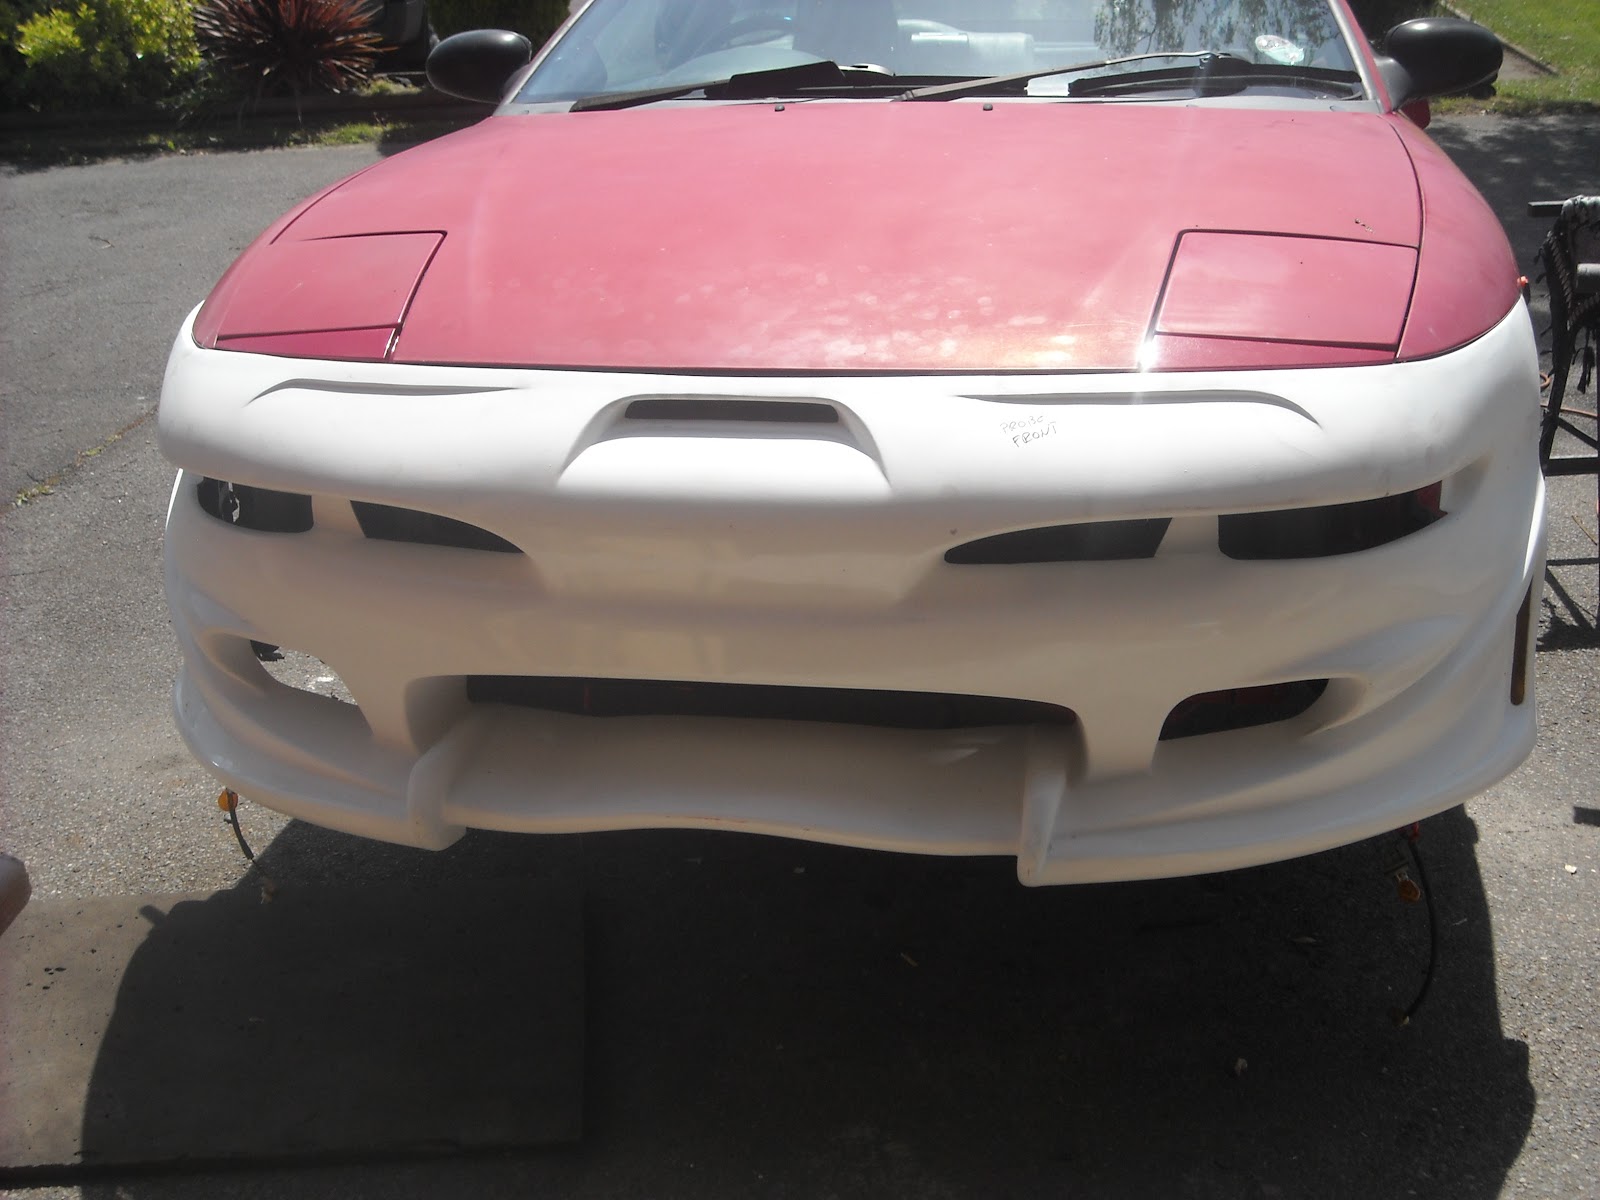
With a bit of persuasion and a round file I got the front bumper on and lined up with the hood and lights.  I then painted the hood and left side (I had already painted all of the right side). Then I fitted the front side light and indicator units.
----
I fitted the wheel arch liners and front wheels, then took it off the stands and finally tightened the wheel nuts. The fit and alignment looked good.
----
The photo below shows the side indicator repeater that I inherited from my friends old Cougar. I took the rubber from the old Probe repeater and with a small cut it fitted the new repeater. Nice touch!

251: Monday 27th May 2013

The front bumper line was a bit weird on one side and I could not get either of the gaps right on the infill panel between the bumper and just below the flip up lights, so I decided to fix the infill panel to the bumper permanently. I also made a small bracket to join the plastic substructure to the bumper and fibre glassed it and the substructure on.
----
I put an initial layer of fibreglass in the gap
----
When the first layer had set another layer went in to build it up to right level for a finish.
----
Next I sanded the fibre glass back to the level of the panel and the bumper. This revealed a row of pitted areas.
----
I put on a layer of filler. I use David's Isopon P38. Other brands are just as good, but I didn't realise that until recently, as it was all my local store had.
----
I sanded back the filler until it was just transparent and perfectly flat.
----
I put on a coat of white primer, then a coat of red. I also painted all the inside of the panel so that any part seen through a gap will be red. I ran out of day and put the bumper in the garage to dry. I wanted to have another day, but I guess it will just have to wait until the weekend unless I can do some more in the evening maybe. I am pleased with the way this has gone. I need to make a couple of brackets once the bumper is mounted to finish the fixing supports and then ready to finish the painting.

250: Sunday 26th May 2013

Started work on the front bumper yesterday. I spent some time helping with some gardening out the front as we are getting rid of our planter and having more space on the driveway for parking. I took the original bumper off and stripped the substructures and supporting bars off as well as the number plate and holder and the side lights / indicator units. Today I started with a loose fit of the front bumper. The photo below shows it hanging on the body with just a plastic clamp on each side. It was a good fit.
----
 I transferred the lights onto the new bumper. This was a simple matter of drilling the screw holes then fixing them. The substructures and support bars were all linked, so from one wheel arch, across the front to the other, everything was linked up. This made the aligning of the supports etc. really easy as then ends could only go in one place and everything else fitted well in between. Drilled all the holes and fitted it all together then mounted on the car. A few minor adjustments with a round file and it all fits well now. Tomorrow I shall be fibre glassing the sub structures to the skin or screws and nuts etc, then ready for painting.

249: Saturday 18th May 2013

With all the holes in the door and side filled I gave bottom half a blow over in red. I had sealed inside the door with polyurethane sealant and this was painted over too.
----
Wheels back on then off the axle stands.
----
Now just the front bumper and finish up the rest of the painting ready for a professional job. I still have no new batteries, so not ready to go back on the road yet. I had a short drive round to the car park to take some photos and back to my driveway and it was then dead. The duff battery I have is taking power out of the pack, so it is not really getting charged now.

----
More pics....

248: Sunday 5th May 2103

Started on a beautiful Saturday morning by removing the inner door panel. I had about 10 or 11 holes in the door where the clips for the old trim panel were. As this was not needed and would look silly now I had to fill these. With a fresh mix of fibre glass, I took my plastic scraper with some fibre glass on it inside the door and covered the holes from behind. While this was drying I went out to the summer house at the back of garden and got the other side skirt. I took off the old side skirt and trimmed a strip from it with the clips attached, fitted the strip back on then offered up the new panel. The panel would not go anywhere near the body with the clips strip attached. I took the clip strip off and offered the panel up again and checked the gap. It was a good fit, much better than the other side. By this time the fibre glass on the door was dry and I ground back the excess and spray painted with primer to stop any rusting. Then the rain came, and then the Hail came. So I went indoors and Twister was on TV, so I sat and watched, and that was Saturday.

----
Sunday was a beautiful morning, the sun was shining and I got reasonably early start (10 am). I filled the holes in the door that were fibre glassed ground back and primed the day before. I also filled the rear bumper panel as there was a dip where I had got carried away with the sander machine. I carried on with adjusting the clip strip on the other side skirt while the filler was drying. I cut more off the strip and made it so the clips were only secure on one side and could be bent in. I took one clip off altogether and cut the strip into 2 parts. The rear part was still too big, so I decided to just have one clip at the rear. I reworked one clip so it would fit under the trim, then drilled holes to mount the panel with screws. With the side panel nice and secure and fitted generally I marked the top of the trim where it meets the door ready to be trimmed later. This is necessary in order to make the door open without catching as the panel needs to drop down a few millimeters. The process was mostly the same as the other side except I kept some of the clips together on a strip of plastic to make is easier to mount them. The filler on the door dried and I rubbed it down to make it smooth. It took me 2 goes to apply the filler as it was so hot that it was going hard quite quickly. I sanded it back smooth, but the rear bumper needed another layer, so I mixed some more and put it on. More sanding and then  was ready to mask up the windows and other trim so they didn't get painted. I put primer over the bottom half of the door, generally covering my work and the rear bumper repair. A light sand by hand and I was ready to prep for painting. This involved a quick dust off with a dry micro-fibre cloth and a tissue wipe with white spirit to remove any trace of grease or other chemicals. I also sprayed a bit of the rear bumper where it had picked up some over spray of primer from another day. I sprayed the repair on the rear bumper and the rear quarter panel. I sprayed inside the edge of the door over the polyurethane sealant and then the outside of the door. I didn't have enough paint in the can to finish the door, but I got most of it done and it is not super important to be finished at this stage as  have plenty more painting to do and I can go over it again then. It is starting to look better and better.

247: Saturday 20th Aprl 2013

So on with the bodywork. The weather was good all day and I got a lot done today.
I finished up the filling of the holes and smoothing off. I had also painted the rear tailgate. It really shows up the pinkness of the rest of the paintwork. Even though this paint work is only temporary, it looks so much better than before.
----
I masked off the surrounding area to prevent over spray going on the trim or anywhere else then sprayed the repaired parts so when the side skirt goes back on then it can stay on.
----
After the preparation yesterday, I came out to a freshly primed side skirt today. I gave it a good rub all over to flatten out the finish. Then on with the red paint. It took a good few coats to get it all covered as there are quite a lot of details on this panel.
----
Fitting the side panel was challenging. I had filled over one of the holes for a screw in the body, but I was able to drill it through from behind. I had to drill some fresh holes in the front and back under the wheel arches. One of the screws was cut off too short, so it would not reach the body and I could not pull the panel in tight. I also removed the styling line from the side. This gave me a sore thumb as it was fixed on with foam double-sided tape. The easiest way to remove this was to roll it off and this hurt even with leather palmed gloves.
----
I put a paint scraper between the body and the screw and hammered a socket over the screw head to push it through the filler I had used to hide the screw head. I forgot there was a nut on the back and that came through too. So now I had a bigger hole than the screw. I got a bigger screw, but the head was now too big and would stick out, so I put the screw in my pillar drill and filed the head to a counter sunk cross section. Once this was fitted the panel pulled in nice and tight to the body.
----
Finally I put some fibre glass over the screw head so it would be dry for tomorrow and I can sand it down and fill it and paint it etc. There were also another couple nicks where I caught the side skirt that need touching up.
----
Tomorrow I need to track down some more red paint as I bought the last tin from my local shop. Then I can paint the rear quarter and start on the door. Loads of holes to fill in where the clips for the old panel was removed. Then repairs to the rear bumper before starting the other side skirt.

244: Saturday 23rd February 2013

I had a friend come round today to help load the rear bumper carefully onto my car. We caused a few minor pint chips that I will need to touch up at some point. I took it for a little drive and hit a speed bump too fast and caught the rear bumper. It made an awful racket, but only a tiny paint chip right at the bottom. It did pop the side fixings right by the wheel arches on both side, so I need to fix them again. The colour match is good though I think it looks cool, can't wait to get the side skirts and front bumper on now. The photo does not do it justice.

243: Friday 22nd February 2013

The new grille material arrived Wednesday, and it was my daughter Sydney-Ann's 17th Birthday yesterday. So armed with her provisional driving license and some insurance we went driving. She has driven at a closed driving centre many times before, so she knows how to handle a car, but this was her first time on the open road. She did really well on her first drive than had a driving lesson with an instructor later in the afternoon. This was a bit of a shock to her, but she didn't really like the instructors teaching style so now we are looking for a new instructor. Day 2 of her driving and she has calmed down a bit more now and I had time to go fit the mesh on my rear body kit bumper. I put the bumper face down on some trestles (with padding), offered up the mesh to the holes to be covered and marked them about 15mm larger than the hole with a red marker pen. I took some electrical cutters and nipped along the marked lines to get the general shape. I offered the mesh up the bumper and generally bent the edges over carefully. Then I took a small hammer and gently tapped the edges of the mesh. It felt soft like shaping lead, and it was easy to work. I then mixed up some P40 fibre glass and applied it below the mesh and then pulled it up onto the edges. When it was dry I could turn it over to take this photo. Everything is nice and solid and it looks really neat. Next is to fit the bumper on the car, hopefully for the last time, then I can put the wheels back on and get him back on the road.