295:Saturday 28th October 2017

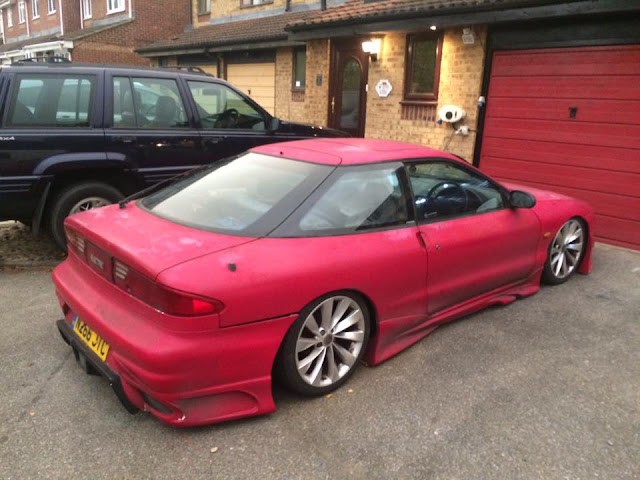
Over the last couple of weeks I have been fitting the Air suspension struts to sparky.
 
----
I borrowed a 2 post lift from my friend and neighbour Luke for a weekend. On Saturday 14th October 2017 I had my friend Trevor Harding helping immensely.
----
Before we could get to the bolts we had to remove the trim panels in the back, but these were held down by the battery pack and it's racking. That was the first hour or so.
----
The struts went on fairly easily with a bit of release oil on the threads. Setting up the bottom height was a matter of trial and error to start with. Our friend Duncan Thomas turned up later to see how it was going and helped run the air lines from the rear struts to the valve block at the front.
----
On Sunday 14th October 2017, Duncan Thomas came along to help and we got the front struts fitted. After the experience of the rear struts, the front was easy, but ran out of time to do any setting for the bottom height.
----
While the drive battery was disconnected, the 12v system was getting no top up, and the battery wasn't great. When I cam to power up the compressor on Saturday it damaged the DC-DC converter so there was no recharging of the 12v system. I connected a mains charger to the 12v system on Sunday when we started and there was just enough juice to do the journey home. I had to order another DC-DC converter and I am still waiting for it to come from USA.
 

----
I saw an advert for some LED light strips for the rear lights and bought some from EBay. I fitted these and also installed a new electric aerial only to find I had 2 male connectors in the trunk. I have ordered an adapter with 2 female connector to join these together. That's something to watch out for when buying a universal fitting aerial.

294: Sunday 10th September 2017

Since the last post the 2 cells in my battery pack that were suspect have officially died. I have remove them from the connections but kept them on the end of the pack to prevent the other batteries moving. I then disconnected the charger output and opened the case. Carefully with the power on, I adjusted the output voltage to the new lower voltage now that I was down to 36 cells. Put it all back together and all was working fine again. I have been using the car now for a while, but at first it was very low on acceleration even in 1st gear. After trying lots of different settings, I ran the optimization routine and then the power level was a lot better and the acceleration was good in 1st gear. Having less power than the old DC motor and controller was something I now getting used to. I have noticed that with just basic regen for throttle lift off, I am using much less capacity and I reckon the power usage is around 300 Wh/mile.
----
So now I'm up and running again I've switch my attention back to the air suspension. First I mounted the tank in the space where the old lead acid batteries used to be, then the compressor just under the left headlamp. I had to fabricate some brackets for this and I found that when I went to put the tank back after fitting the compressor, there was no room to fit an elbow on the end, so I made some brackets to move it over by 65mm. 
----
With the tank and compressor in place, the next job was to mount the valve block. When I tried to connect the air pie from the tank filter, it was difficult and was a tight bend to get across by the tank. I made some new brackets and raised it up about 50mm.

---- 
Next job was to wire it all up and make the air connections from the tank to the valve bock and the compressor to the tank. I ran the usb cable through to the inside of the car and threaded the motor controller usb cable through at the same time. on the front you can see the remote controller (wired). I could operate each valve successfully once the pressure in the tank had built up. I also tried my mobile phone app and that worked too. I noticed the pressure was dropping slowly, so I put some leak indicator on all the joints and found bubbles at the junction of the pressure switch and the adaptor for the tank. I took it apart and put some PTFE tape around the threads and fitted all back together, problem solved. I pressurized the system and watched the pressure drop again, but then it stabilized. I shall check it again in the morning. Next job is to run the pipes to each corner of the car and then fit the new air struts. These were adapted specifically for the Ford Probe so they should go straight on. Will need to drill some holes in the inner wings to run the pipes through unless I can loop them under as there are plastic wheel arch liners.

293: Wednesday 9th August 2017

No photos today, but good news I have my AC drive system running.

First time I powered up the system I had an error 18 (Severe B+ Overvoltage) flashing on the LEDs. I had already got the software and cable to configure the drive, so I thought I'd just go in and set it up.

I couldn't find the cable...! I paid nearly £60 for this on eBay and turned the house and garage upside-down trying to find it before I reluctantly ordered another (another £60). It came quickly from Germany. I connected my laptop and after a bit of dialogue with the guy in Germany and a few windows registry settings changed, I could set parameters in the motor controller. This might be useful for others as the Curtis 1239e controller is still quite new. The hardware set-up has some slight differences with 1238. The reason I chose this model was the wide range of voltages (72v to 144v) that is can work with and the 12v control side that is not affected by the drive battery pack voltage.

So the error 18 was not due to overvoltage, but with the controller being configured with a low voltage, so I changed the battery pack setting to 121.6v and then the fault cleared. I linked out the interlock for the throttle and then I had a main contactor fault. This was preventing the main contactor from closing (error 39).

At this point I went to enter the settings that I had been sent from Jeremy who sold me the motor and drive. The next problem was that I could not open the excel sheet. I tried everything and I was getting errors from windows. I went to work the next day and opened the file no problem on my pc at work, so I did a cheeky 'save as' in various excel version formats to my cloud drive at home. I printed a hard copy just in case. When I got home I decided to just use the hard copy and put the settings in the controller.

When I keyed on with the new settings the contactor gave a nice click after the pre-charge had built up enough voltage at the capacitors on the B+ terminal. I then had an error 47 sequence fault. I wired the throttle switch to the interlock input and then the fault was still there. I used the input monitor screen to note the throttle min and max voltages and then entered these into the parameters. The fault code cleared.

When I powered up there were no fault codes, so I checked the gearbox was in neutral and operated the throttle pot... Nothing...! I looked at the input on the screen and I could see the input for the throttle switch, but no input for forward or reverse. I checked the wiring and found I had omitted a connection to the forward and reverse relays for the signal supply. I had removed this from the circuit because my old DC drive had 120v control signals, so had a 120v supply to the relay contacts. I replaced this with the 12v supply and then I could see the input for the forward switch working on the screen and motor came to life. I checked the reverse input too. I put it into 3rd gear and gave the drive a little bump with the throttle to check the motor was turning the right way for the car to go forward. All o.k.

I noticed at this point that my battery monitor was showing extremely low on 2 of the bars. I check the individual batteries with my multi-meter and they were really low. I had suspected these 2 batteries of being faulty or damaged some time ago, but this was just from being left alone with the Anderson connector disconnected (no load), so they were self discharging somehow. Next job is to reconnect the charger and get everything bolted down and secured so I can go on the road.

292: Saturday 24th June 2017

 
It's been a while since the brushes burnt out on my old DC motor and I started the change to AC. I had painted the new bracket for the rear motor mount and went out to fit all the brackets. I had forgotten to paint the modified driveshaft bearing support bracket. So I painted that and then spent some time tidying my tools away. I have been working on my kitchen at the weekends and spent one weekend in Dublin Ireland to see Kraftwerk live at the gas board theatre. Today I got back on the Probatron conversion. I needed to strike a compromise because I still have things to do with the house and the car, so I am doing car on Saturdays and House on Sundays until both are moved on. The picture below shows the new Curtis controller and my old DC-DC converter positioned on my old heat sink that I had for the Zapi controller.
----
Had to do a bit of drilling and cutting the fins on the heat sink to get the bolt holes lined up on the controller. I also mounted the throttle brackets and fitted a new spring to the throttle box. I then mounted the whole assembly onto the car brackets. The controller was touching the brake pipes on the firewall, so I gave the pipes a tweak with a hammer and a block of wood then it bolted in just fine.

291: Sunday 7th May 2017

The last 2 weekends have been about changing from DC motor and controller to AC. I had the brushes burn out again around Easter time and I figure now is the time to change to AC (no brushes, better regen capabilities). The picture below shows the controller and charger removed with the old motor still in the car. Notice there is only a small gap between the motor and the body.
----
I found a company in UK that had some HPEVS AC-50 motors and was able to get me a Curtis 1239 controller for a reasonable price. This works well with my existing 120v battery pack. This is a smaller motor than what I took out and also the controller is a lower rating, but the cost to get performance is too high. I found the low speed performance of the DC motor to  be excessive for my journeys, but the AC system behaviour is so much more configurable with the Curtis controller.
----
The motor fixings were the same as the old motor including the 4 threaded bolt holes around the perimeter and the shaft size was the same. The only difference was the shaft was shorter. The old motor had an 11mm spacer to hold the taper lock hub off the motor. This provided the right geometry for the clutch to be in the correct position for the actuator. With no spacer, the hub was rubbing on the motor. With the 11mm spacer, the hub was hanging off the end of the motor shaft. Neither of these conditions was acceptable. My neighbour Luke has a friend who has a lathe in his garden workshop so we went to see him and he made the outer mounting ring 9mm shorter and made me a 2mm spacer This then gave the same distance as an 11mm spacer. You can see in the photo below the hub is lined up nicely with the end of the motor shaft. I had to cut the stepped key to match this length. I inserted the adapter bolts around the edge of the hub before locking the on the motor shaft. I then added the flywheel adapter, then the outer ring and bell housing adapter plate, then the flywheel and clutch in that order. I mounted The motor last Saturday with help from my friend Sandy
----
The place where I got the motor from had some other bits that I paid a bit extra for such as wiring looms, shaft key, motor bolts, rear motor cover and this rear mounting bracket. At this stage as shown in the photo I was on my second attempt at marrying my old mount and this new one. I had cut off the bent part of the bracket as my first attempt was to add an extra 12mm of metal to bridge the gap difference with the old mount. I Decided to just use bigger angle section and replace the whole end of the new bracket. I had to cut another slot for the transducer cables on the back of the motor. The bracket is just tack welded in this here.
----
Monday night I went with my neighbour Luke to his workshop where he MIG welded the joints, then went over them with a TIG welder to make them look neater as this will be on show. We added 2 triangles on the back and one on the front to provide extra strength and rigidity and help prevent any twisting. These were also MIG and TIG welded. I just need to give them a good coat of paint then it is ready to go back on. We also re-made the drive shaft bearing support bracket to fit this new motor set-up.

290: Sunday 23rd April 2017

On my way home from work just before Easter and sparkie broke down with the motor arcing. Got the motor out today and 2 of the 8 brushes have gone and the rest are badly worn. I am going to take the plunge and change to AC. I'm going with a HPEVS AC-50 motor and a Curtis 1239-8501 at 120v. Also the taper lock was broken on the flywheel hub, so that explains the clonking when pulling away.

289: Tuesday 4th April 2017

Saturday my friend Sandy came round and helped me get the air receiver fitted for the air suspension system. The feet on the receiver almost exactly matched the rails they were going on to. I pulled out some 40mm L section mild steel and we made 2 brackets to fix to the rails. We then drilled holes in the sides of the brackets to bolt the receiver on and then offered it up to the rails to mark through the other holes. We then drilled the rails and fitted the tank to the car. Last job for Saturday was to paint the new brackets with smooth red Hammerite.
----
Sunday Morning I bolted the receiver tank. In the the photo below you can see it in the car nice and secure. Next job is to make a bracket to mount the compressor pump and valve block.

288: Friday 31st March 2017

Last Saturday I set out to make space for the Air suspension equipment. The main space is needed for the Air Tank that is about 550mm x 260mm diameter. Also need to mount the compressor and the air management valve block. I took out the old battery racks that were left over from when I had lead-acid batteries in the front of the car. I had to put his back so it was supporting the front slam panel for the hood. This is not a very strong panel and I had to cut the original mount to get batteries in there. So with a basic frame prepared I moved the Anderson Connector, Current shunt and wooden mount, brake vacuum pump and the gauge driver circuit as well as re-routing the cables. The Air Tank drops in right on the frame (by luck) so I just need to make some brackets to fix it down.

287:Monday 20th March 2017

Been busy this last few weekends. I got a new head unit. I had to remove the display from the places for the centre console air vents and perform some serious surgery. I cut out the front panel so there was space to see the whole of the 7 inch touch screen. and get to the volume knob. I used a soldering iron and a file to fold the edge of the plastic over where I had cut through. It was a tricky operation that I wouldn't want to repeat. I had to cut out the vent duct from behind the unit too. I used the cradle from my old head unit and with some cutting and bending I fashion a bracket for the new unit to sit in. I had a couple of looms already I used to make a new loom for connecting to the probe. The problem is that the euro connector wants to connect speaker outputs to line inputs on the Probe pre-amplifier. The head unit had RCA Phone output on it so I soldered RCA phone connectors to the loom and connected straight onto the head unit. The previous head unit only had 2 phono outputs so I had to join front and rear together. this one had 4, so no problem. Sounds so much better. I need to replace the rear speakers, but I have some from a Ford Cougar that fit correctly and shouldn't fall apart like the last ones.

----

With the new head unit in I have been driving round for the last 2 weeks with no battery monitoring displays. This made me a bit nervous, but I just gave myself an extra safety margin on the distance and stuck to it. Yesterday I finished mounting the displays and it's all back together now. I just need some clips to hold the front panel in as they are missing and it springs out slightly, but will push in very easily with the clips. I used layers of hardboard to make a mount that the displays fit into.
----
The layers were glued together and place under a car battery while we went to watch my daughter play football and win 5-0...!
----
Then the felt was stuck on to make it look OK for fitting in the front panel.
----
The displays were secured using screws with washers around the edges on the small touch screen and some specially made clamps for the JLD 404 unit.
----
The whole face panel was then fitted back in the centre console. I needed to do some shaving inside to get the JLD 404 in so it was not being pushed sideways. I also had to mount the stop button and the 'forward / reverse' switch on the top of the dash. The gear shift was in the way of the JLD 404 when I was in 3rd gear (normal) so I have to look round it. I cannot think of another way to get all this in. Driving in 2nd gear just feels weird. I might have to find a way of shortening the gear lever. It's another job to add to the list.
----
Finally I have got my air-ride kit and that is the next job. I have opted for the more expensive kit with the ride management so I can preset heights and operate the suspension from my phone from outside the car. I tried to install the android app onto my head unit, but the manufacturer reckons I have the wrong version of blue tooth. I shall try a side loader, see if I can get it in and maybe it will work. Worst case it won't work and I'll just use the controller that came with it. The control panel looks like an iPhone...